Microlinks do not only work on straight and wavy hair but also adaptable to natural curly hair. In a word, microlink hair extensions are available for any textured hair. Microlinks can be installed in different ways. Traditionally, there are I-tip and beads weft extensions which can both be applied with special pliers and tiny silicone beads. In braidless sew-in method, the microbeads are attached at first and the weft will be sewed in with thread during which process the beads are used as anchors. The I-tips are attaching hair strands by clamping your hair and hair strands into the same microbeads while the beads weft is attached by crocheting natural hair into the microbeads which have been fixed along the weft. Micro Ring Bead Wefts with fish line hair extension is the easiest method to install. They do not need any sewing or crocheting process.
What are the advantage of microlink hair extensions
No matter I-tips or beads wefts, they are painless and there is less tension on your scalp comparing with traditional extension methods. With proper application, they can blend seamlessly with your natural hair and looks like your own hair. Pretty quick and seamless application brings wonderful results and when they are installed individually, they are clamped pretty tightly down onto your hair and expose all your hair. It takes time for them to be loosen up and move freely on your head.
The biggest advantage of microlinks is versatility. The tracks are covered perfectly and it seems completely undetectable. You can treat them as your natural hair and wear microlinks extensions when you are sleeping. There are not any braids either. The installment process is also pretty safe since they do not require heat or glue. It won’t cause damage to your hair follicles as long as you install and remove your hair extensions in the right way. The I-tip hair strands are lightweight so that there is lower risk of scalp discomfort.
Microlinks boost hair volume and increase hair length which is perfect for those with fine to medium density hair. However, if your hair is thin and damaged which is so fragile that your natural hair is exposed when you wearing microlinks, then it is not healthy any more and you’d better try a different protective way to increase your hair volume such as wigs or headband wigs.
How to choose microlink hair extensions matching natural hair
Quality
When it comes to hair quality, people always mention hair type and hair grade which are the common reference for hair quality. Hair extensions made of human hair, virgin hair and remy hair are of high quality hair since they are from human and the higher is the grade, the better is the hair extensions. High quality human hair is definitely the most cost-effective hair extensions since they can last long with good maintenance and blend well with your natural hair.
You can use heat and coloring agent on them; you can go swim and work out with them; you can style them as your won hair as well. Human hair extensions also come with a lot of colors and textures for your choice and they are tangle-free, healthy extensions in general.
Color
It is recommended to choose the color of microlink hair extensions according to the hue that your natural hair represent from the midshaft to the ends of your hair. The colors in the roots, middle and end of your hair are not quite the same. This part of hair will be exposed to the outside in most time and it is also the area where people see most.
Picking an extensions matching your natural hair is conducive to making a natural blend with your type 3 or type 4 hair and the hair pieces will be absolutely noticeable if the color is deviate from natural color. If your natural hair has been dyed before, then you can choose a colored hair extensions that is similar to your hair. You can also dye the extensions and your natural hair into the same color after you get the microlink hair extensions you like.
What you should pay attention to is that all the hair extensions can be dyed into darker color naturally but if you want a lighter color than the extensions appears when you receive them, the result might not be satisfactory as you expected. The more colors your natural hair contains, the more natural your extensions appear.
Textures
Before choosing microlink hair extensions, figuring out your curl pattern, hair density is beneficial for you when deciding textures of hair extensions and hair density. To make out your curl pattern, you can trim a piece of your natural hair and compare the hair piece to our curl pattern chart. Hair textures vary from 2A to 4C and if you know your hair type well, it is easy for you to choose the right extensions matching your natural hair.
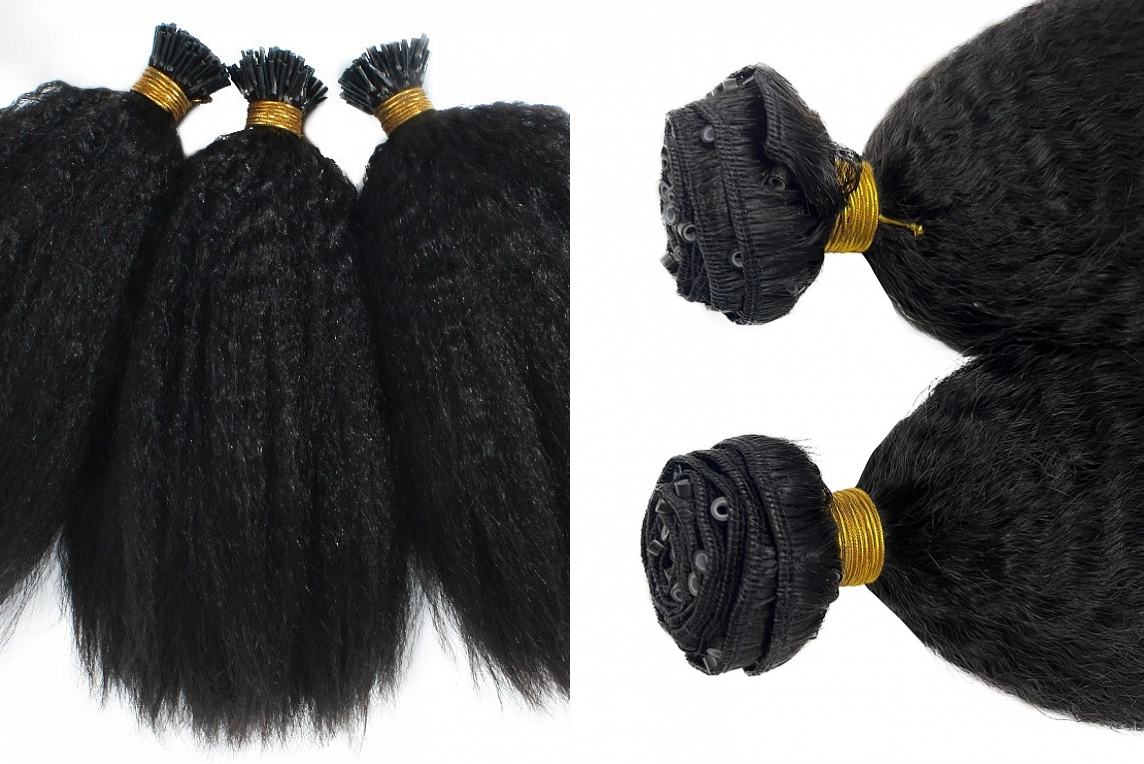
Light Yaki Beads Weft / Itips Hair Extensions
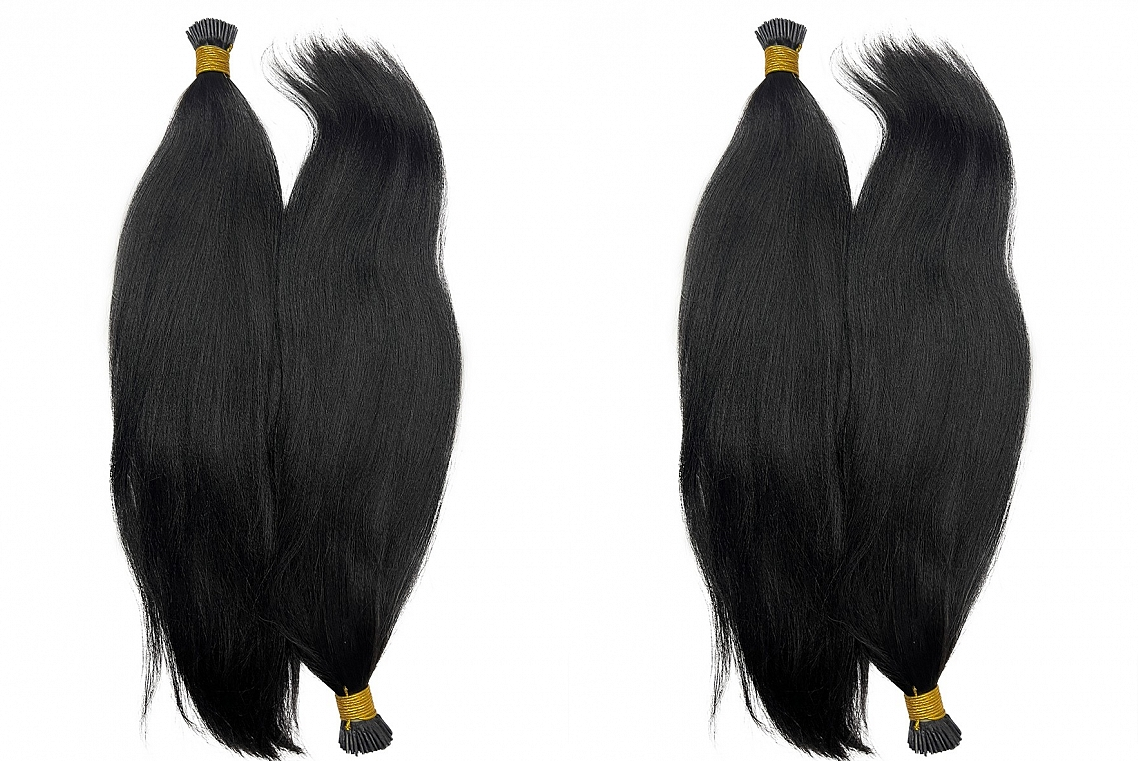
Kinky Straight Beads Weft / Itips Hair Extensions
Wavy Texture
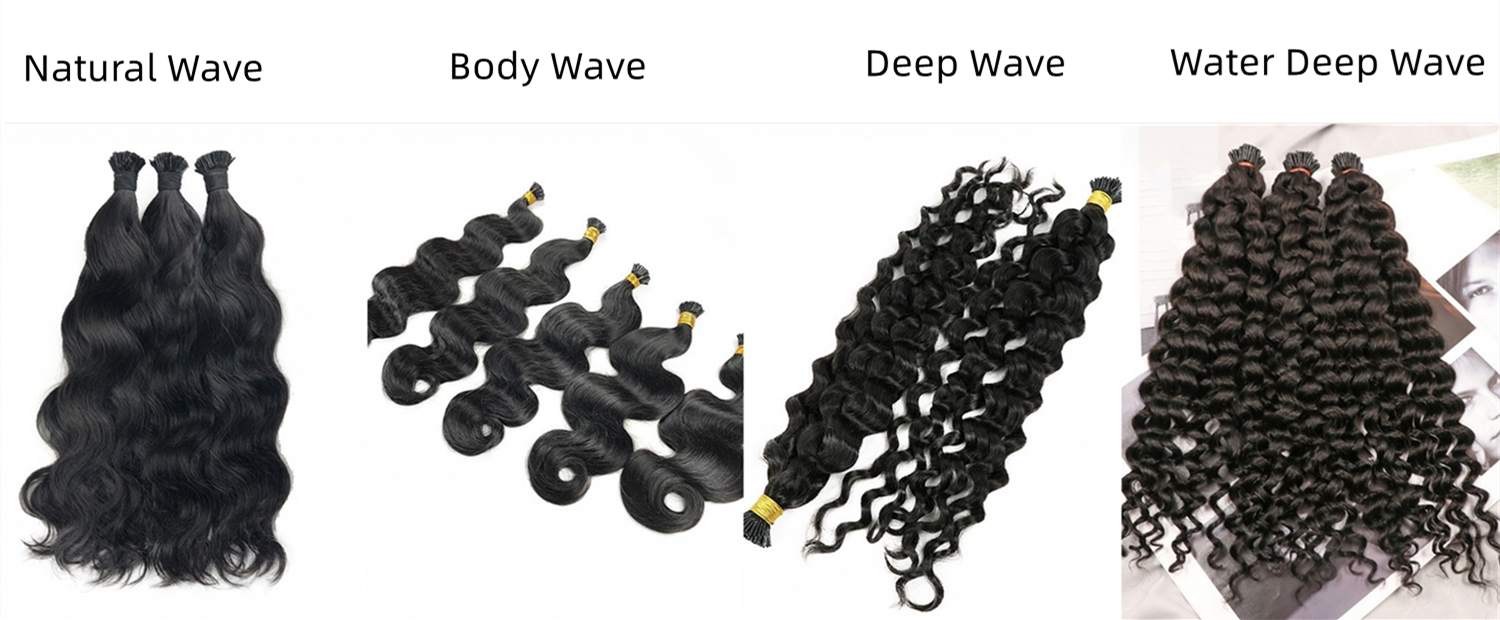
3A-3B Texture
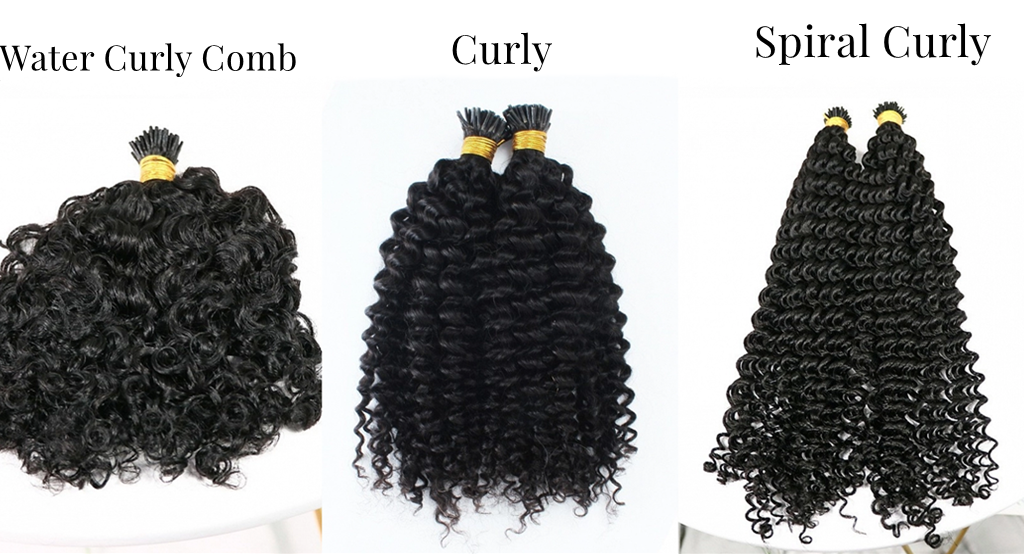
- Water Curly Comb Beads Weft / Itips Hair Extensions
- Curly Beads Weft / Itips Hair Extensions
- Spiral Curly Beads Weft / Itips Hair Extensions
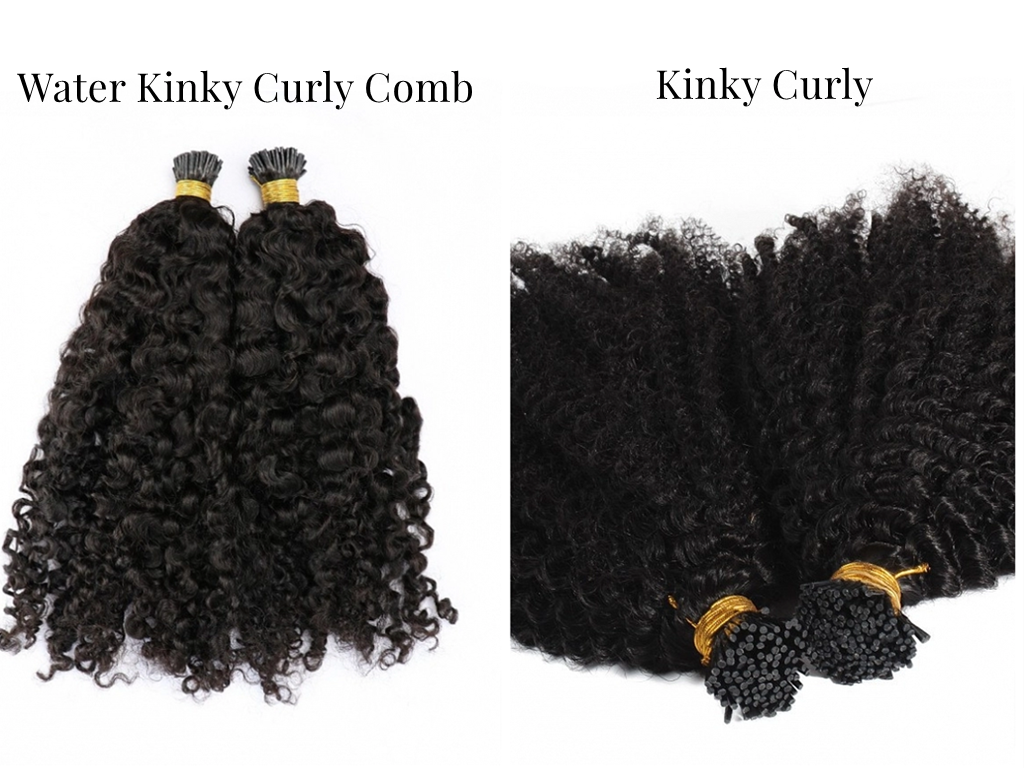
3B-3C Texture
- Water Kinky Curly Comb Beads Weft / Itips Hair Extensions
- Kinky Curly Beads Weft / Itips Hair Extensions
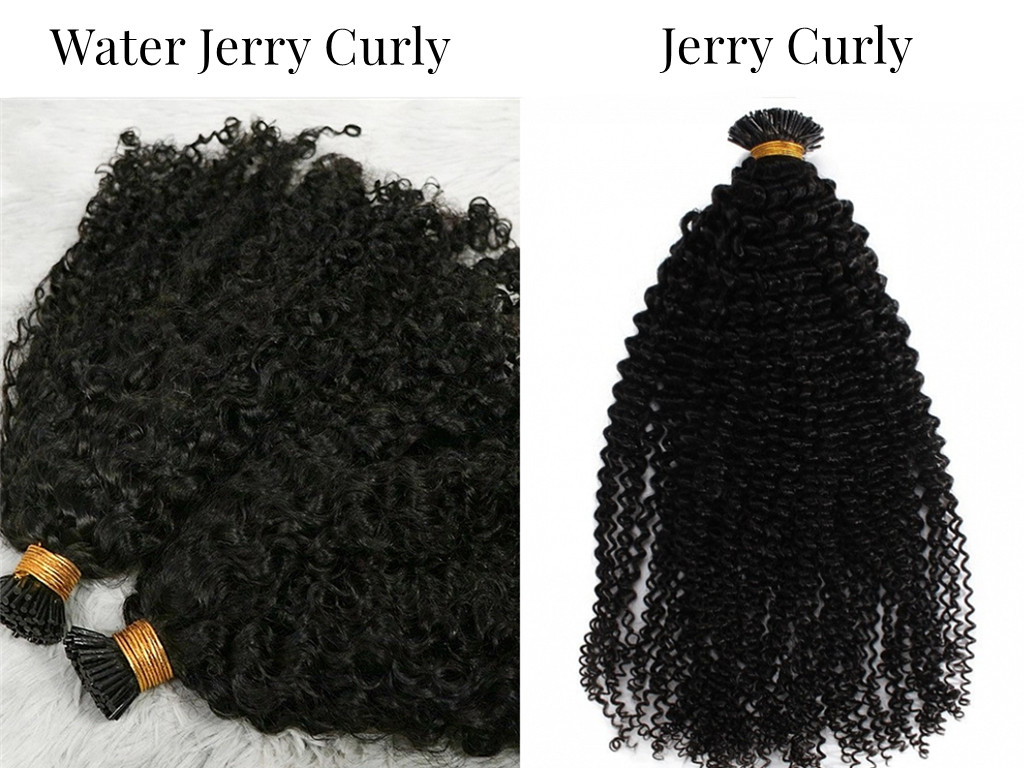
3C-4A Texture
- Jerry Curly Beads Weft / Itips Hair Extensions
- Water Jerry Curly Comb Beads Weft / Itips Hair Extensions
4B-4C Texture
In addition, considering how much hair you have and figuring out your hair density determine how dense your microlink extensions should be. Knowing your curl type and hair density help you decide what texture and how many bundles of hair extensions you need.
If you cannot decide what your curl pattern is, you can consult us and we can give you some advice on hair extensions.
Length
To blend your natural hair and hair extensions well, there should be enough hair on your head to hide the microlinks wefts. In the most cases, chin-length hair will create the best results. The length of curly hair is measured when they are pulled straight.
Which length of curly microlink hair extensions to choose depends on the texture you choose.
Straight hair naturally falls longer because it lies completely flat when it's measured but the curly hair extensions has more volume and short length for the same weight. We measure the length of our curly hair when it is in a straight position and you can cut a piece of your natural hair and pull it straight to measure the length of your natural hair. The length of your hair extensions should be a few inches longer than your natural hair so that you can trim them to get a perfect length.
How to install microlinks hair extensions on natural hair
I-tips hair extensions
To make curly microlink hair extensions, you are supposed to clean your hair extensions and your natural hair before.
Wash your hair extensions and apply the shampoo on them.
- Prepare a basin of mixture of conditioner and water then soak the hair extensions into the mixture for a while. Rinse your microlinks, wring them out to squeeze the water and hang the extensions out to let them air dry.
Wash your natural hair in the next step and clean your natural hair as your daily routine. When your hair extensions and natural hair both are dry, you can start to install then.
Part your natural hair into different sections in horizontal direction and leave out the middle part of the hair on the top for covering the tracks in the last step. Now leave the lowest layer for installing and tie the upper hair or clip them up to make them out of way.
Section the layer further into several strands and start to attach the microbeads frome one side. Push the microbeads into metal loop threader and pull the first strand of your natural hair through the metal loop threader. Pull out the microbeads and push the beads to the roots of your hair. Do not attach the beads too close to your scalp or your extensions will be difficult to move freely when you making hairstyles.
- When you finish pulling all the beads on at one time, take out the I-tips and slide the I-tips through the beads. Clamp the beads down with pliers one by one and mind not clamp them too hard again.
If you install the first layer successfully, you can release the second layer from the bottom and install the microbeads continuously. Insert the I-tips strand by strand repeatedly until you reach the middle part that you left before.
Release the leave out and twist them with your hair extensions. Apply the leave-in hair conditioner on your hair and leave for some time.
Unravel the twists and you will get a quite different look.
Beads weft hair extensions
SEW IN method
- In the first step, part out some hair on the top and leave them out to cover the tracks.
- Part your hair row by row and fix your hair on the top except the lowest layer. Install the microbeads one by one at first.
- Clamp the microbeads down with hair pliers and then you can prepare to sew the weft into your hair.
- Sew the weft from one side to the other side with needle into your hair and make the thread connect the middle part hair between the beads and your scalp to the loop on the weft.
- Lock the weft in place and make sure that it will not go anywhere.
- Re-add the microlinks again in the second layer and sew the second weft into your hair. Repeat the step until you finish installing to the top.
- Release the leave out and mix them with your hair extensions.
NO SEWING method
From the very beginning, leave out some hair in the middle top of your head and tie it up. The leave out will be used to hide the seams where your beads wefts are installed.
- Section your hair into parallel layers in horizontal direction and make the rest hair out of the way when you are going to install your beads weft extensions from the bottom layer.
- Take a weft out with approximate length and measure your hair to get the appropriate length you need from one side to the other side.
- If the weft is not long enough, change a longer weft; if the weft is longer than your head size, then cut the extra length a little bit and leave the same length with your size.
- Hold your beads weft hair extensions and clip them with several clips in the right place along the hair line that your comb out.
- You are going to work from one side and comb out a thin strand from your natural hair in the end of this side.
- Take out the pulling hook and thread the first microbead which is attached in the beads weft.
- Keep the pulling hook in the microbead and continue to hook the strand of hair that you comb out before. Hook your natural hair through the bead and push the bead to the root of your hair. Do not make the microbead too close to your scalp either or your hair can not move flexibly.
- Clamp the microbead down with the pliers and go on to install the rest beads.
- When you finish installing the first weft on your natural hair, turn to the the second row and repeat the previous steps until you get to the top.
- Untie the leave out in the middle top and blend your natural hair with microlink beads weft.
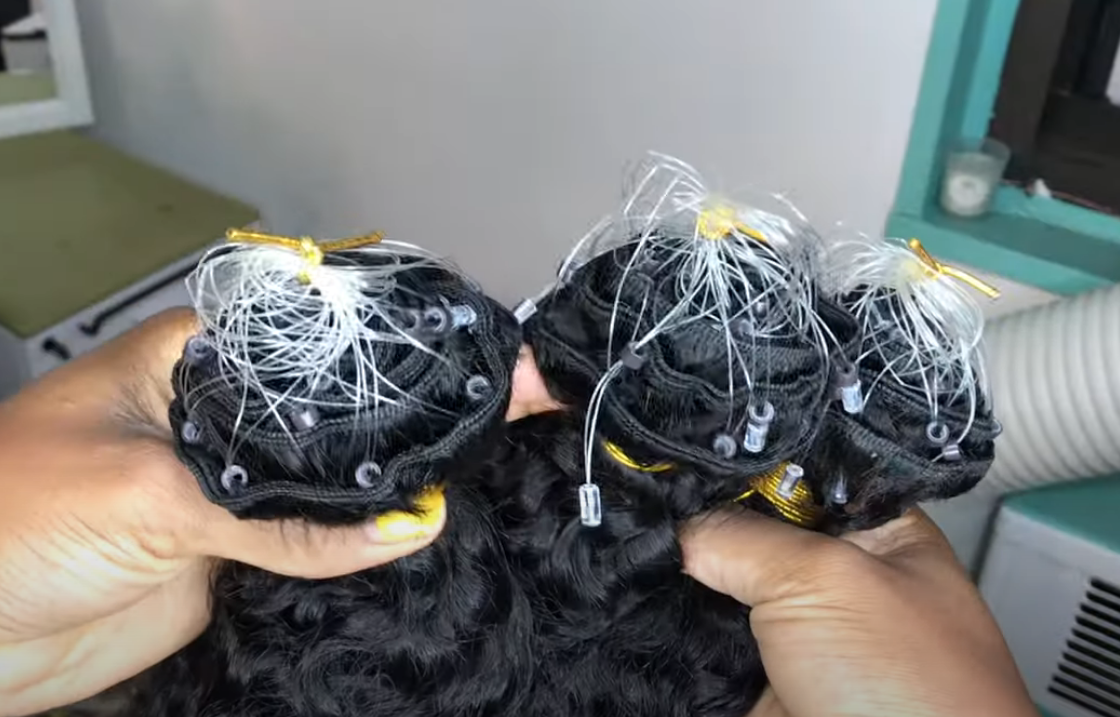
NO SEWING NO CROCHET method
- Part out the bottom layer of natural hair and fix the left hair upwards.
- Take one weft of the microbeads wefts with fish line, turn it upside and leave the microbeads outwards.
- Take a strand of your natural hair and pull it through the first fish line loop from one end.
- Hold the plug and pull the fish line out.
- Push the beads to the end and clamp it down with pliers.
- Part the second strand out and attach it to the second loop.
- Repeat the installing process until reaching the other end and cut the extra length off.
How long do microlink hair extensions last
The microlink hair extensions made from human virgin hair will last from 6 months to a year depending on how your take care of them. The first wear last 2-3 months with proper installment and maintenance. When your new hair grow, the microlinks hair extensions will be loosen up and it is time to remove them and have a nice clean. When you reapply the microlinks, just replace new microbeads and install them again. If your hair grows fast, then you are supposed to reapply them earlier.
How to remove microlinks from natural hair
I-tip hair extensions
- Section out the bottom row to expose the microbeads and tie the left hair out of the way.
- Clip the microbeads with pliers in the vertical direction to which they were flattened. Press it lightly at first and increase the pressure gradually until the beads start to be loosen.
- When the extension slide out Easily, detangle your hair and cleanse your extensions thoroughly.
Beads weft hair extensions
- Cut the threads attached to the weft and the microbeads with scissors.
- Move the wefts away.
- Clip the microbeads with pliers slowly.
- Take the microbeads away when they slide out.
- Detangle your hair and cleanse your extensions thoroughly.
How to make microlink hair extensions last longer
Good extension maintenance routine can ensure microlinks last longer and better. To make the microlink hair extensions last longer, you are supposed to treat them as if they are grown from your scalp.
Wash your hair every 2 weeks and adapt regular conditioning treatment to maintain your extensions. When washing your microlink hair extensions at home, work from the scalp and avoid circle motions because the microbeads are easy to become tangled.
Apply the leave in conditioner from the ends of your hair and distribute them throughout your hair. The hair extension can not benefit from natural oil and they will be healthy with regular condition.
Do not apply too much hair product on your extensions, especially the micro beads. The product might amass in the micro beads and it will be difficult to clean up. If things go on like this, the micro beads will be slippery and the hair strands will slide out from your hair.
Brush your hair when they are still wet with detangling brush and work from the ends to the top to minimize tangling and matting. Detangle your hair regularly to avoid tangles and knots which might bring breakage.
Reduce heat damage when drying your hair extensions. Keep heat away from the area where the microbeads are in case that your hair strands slide out from your hair.
Protect your hair extensions with a silk bonnet or scarf when sleep. Make your hair into a high bun if your hair extensions often tangle at night.
Store your microlinks in somewhere cool and dry. When you don’t put on your hair extensions, lay your extensions neatly and warp them with silk or satin to avoid getting wet, tangled, or squished.
Do microlink grow your hair
Microlinks hair extensions can not promote hair growth but they allow your hair grow from your scalp since there are accesses to your scalp. The installment is not from the root of your natural hair and the new growing hair will not be damaged. Scalp treatment and conditioning can promote hair growth while microlinks increasing your hair volume and thickness.
Microlink I-tip hair extensions meet the need of those who want permanent extensions without too much tensions while beads wefts are great for adding hair density and length naturally. When you are picking what type of hair extensions suit you, think about what you are going to achieve. What type of extensions you should opt depend on your hair texture, and curly micro links match your hair texture in different ways. The microlinks are low maintenance and the cost of installment is relatively expensive for hairstylist.